Thule.net SSO tutorial | Extranet | United Kingdom

Thule.net sign-in tutorial

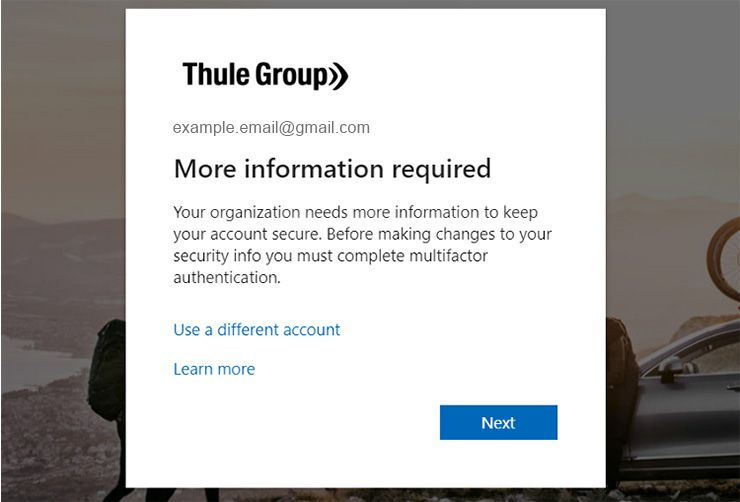
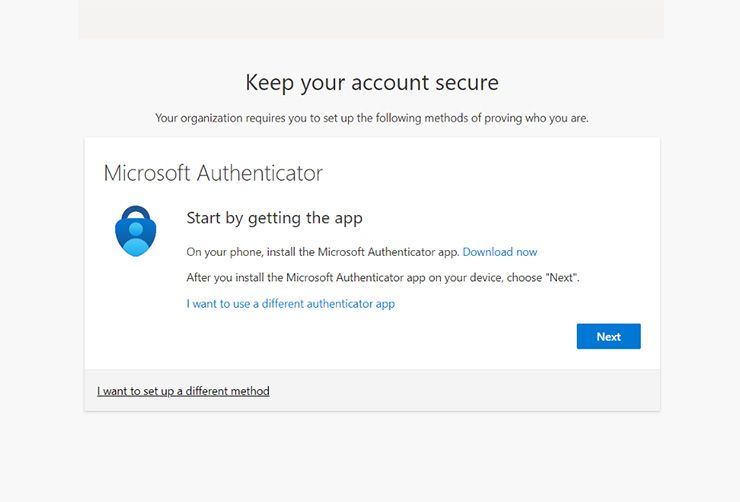
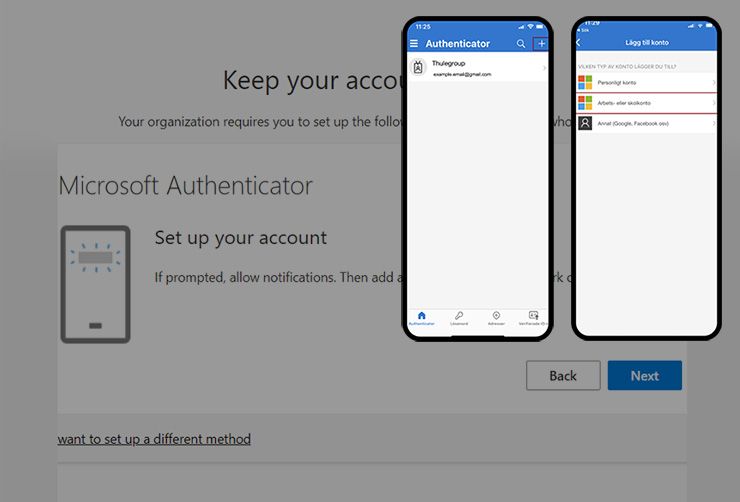
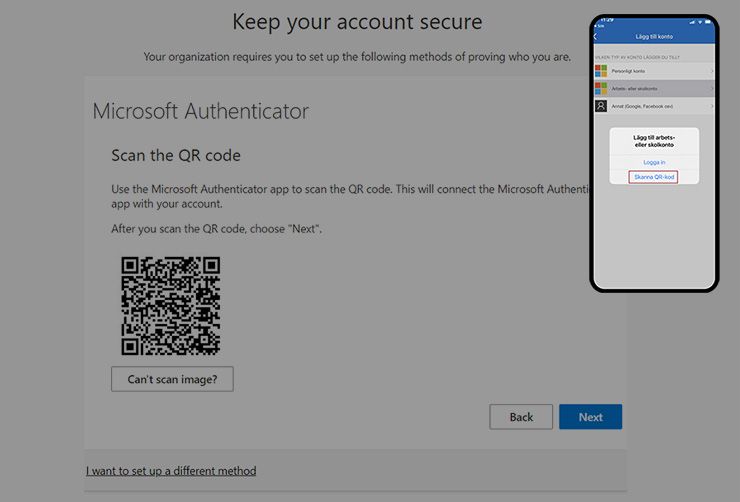
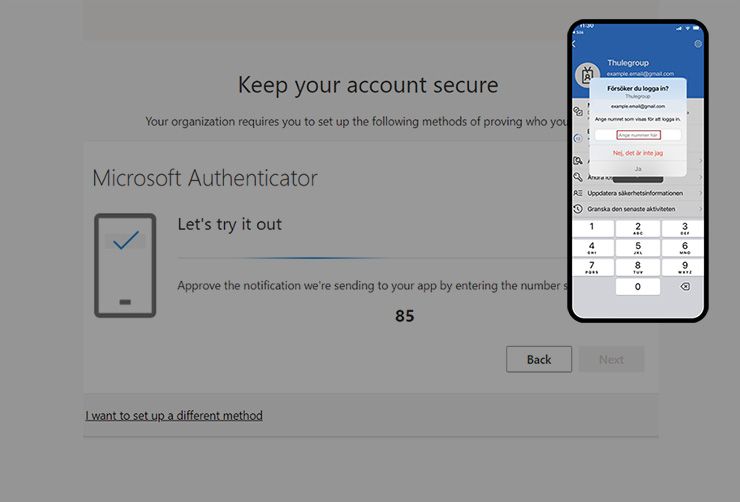
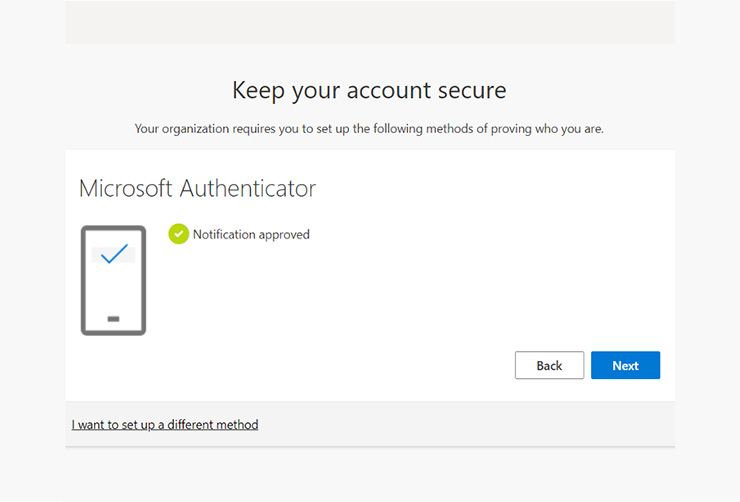
To improve security and to enable easy access to Thule.net, the Mediabank, and other services, Thule has set up multi-factor authentication using Microsoft Azure.

Before you proceed, we recommend that you ensure the following:


Know if you have a Microsoft account and the password

If unsure if you have one or the password, you can check this by going to: https://account.microsoft.com/account/Account

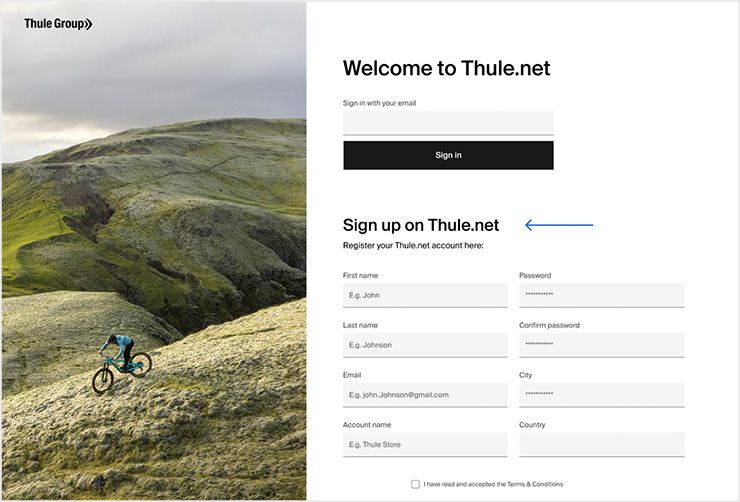
Your Microsoft Azure email username matches your Thule.net account

Example of incorrect setup:

Microsoft log in = [email protected]

Thule.net log in = [email protected]


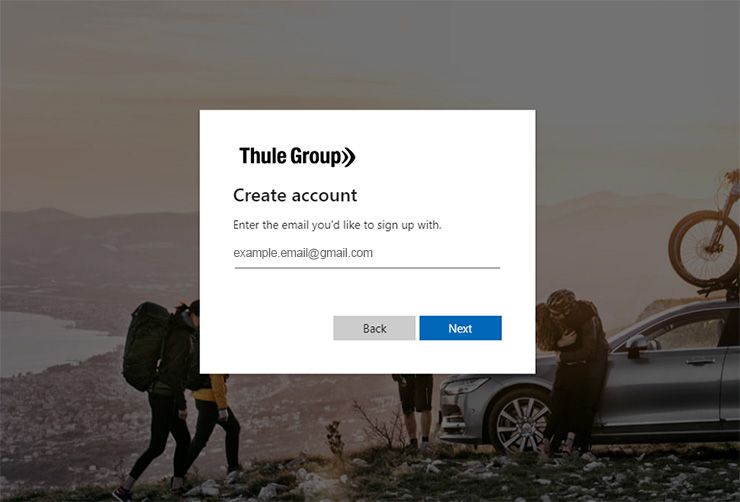
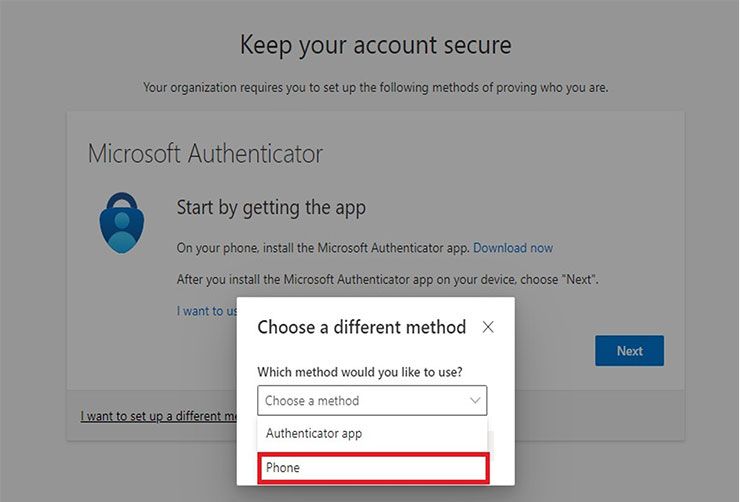
If you would like your Thule.net username changed to your existing Microsoft email please contact dealer services, or you can easily create a new Microsoft account during the initial authentication process. (See Step 4)

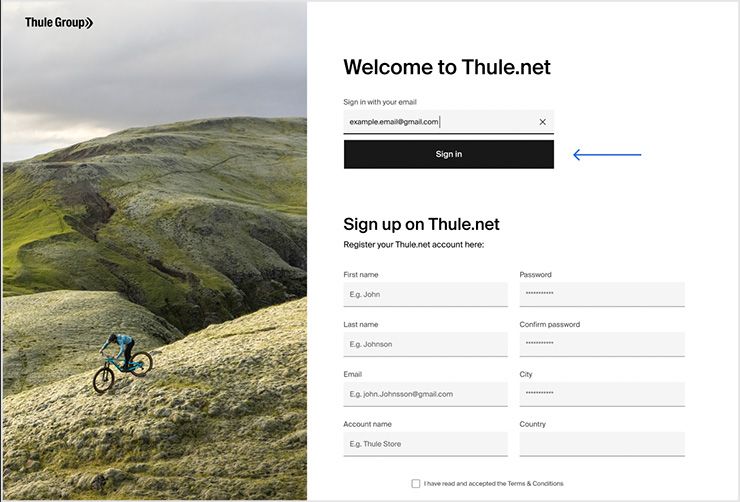
Your Thule.net log-in email is not shared

It will be important for the authentication process that the default phone number set to the username isn’t shared between multiple users or store locations to avoid issues and lockouts. If new users are needed in Thule.net to accommodate all log-ins, please contact dealer services.

Click sign in.

Go to https://www.thule.net

Add Thule.net email here and click Login (this step starts the invite to ThuleGroup Azure)
Email client image

2. Go to your Outlook/Email client

Look for an email from [email protected]​. Click on Accept Invitation. This will start the setup of the authenticator process and the account in Azure. If you do not receive this email invite do not proceed. Contact Dealer Services. ​

How would you like to authenticate?


Authenticate using the Microsoft Authenticator App​

Download the Microsoft Authenticator app.

1. Download the Microsoft Authenticator app

Make sure that you have downloaded the Microsoft Authenticator app on your phone.
Click sign in.

2. Click “Sign in”

Fill in your email and click on the black ”Sign in” button to get started.
Choose an existing account or add a new one.

3. Choose an existing account or add a new one

Fill in an existing account if you have one, or click on “No account? Create one” to create a new account.
Create an account.

4. Create an account

Fill in your email address. click “Next”, accept terms, and wait until your account is created.
Authenticate with your mobile phone.

5. Authenticate with your mobile phone

Now it’s time for the authentication step. This is where you need your mobile phone. Click “Next”.
Open the Microsoft Authenticator App.

6. Open the Microsoft Authenticator App

The next window will prompt you to open the Microsoft Authenticator App on your mobile phone. Click “Next” and then open the app on your phone.
Set up the Microsoft Authenticator app.

7. Set up the Microsoft Authenticator app

Click “Next” on the desktop screen. In the app on your phone, click the “+” button on the top right corner to choose a work or school account.
Scan the QR code.

8. Scan the QR code

The Microsoft Authenticator App will then ask if you want to log in or scan a QR code. Choose to scan a QR code and scan the code that is present on your desktop screen. Then, click “Next”.
Enter the number on your screen.

9. Enter the number on your screen

A number will appear on the screen of your computer. Enter the number into the Microsoft Authenticator App.
Notification approved.

10. Notification approved

Once the notification is approved, click “Next”.
Success message.

11. Success!

Once you have successfully set up your security information, click “Done”.
You are signed in message.

12. You are signed in!

You have now successfully signed in using multi-factor authentication.

Authenticate using a phone

If a user doesn't have the Microsoft Authenticator app or would prefer not to use it, the only requirement i
s that the user has access to a phone. This guide describes the steps to set up SSO access for these users.

Follow the first steps on the top of this page to create and accept the user invite.

The Azure Command Prompt launches and prompts the user to select an account. If the user doesn't have an Azure account, select Use a different account. This must match the user email invite set up in Thule.net. You may not see this selection and could jump to the next step depending on your setup.

Choose an existing account or add a new one.

1. Sign in

Enter your email address and click Next.
Authenticate with your mobile phone.

2. Click “Next” again

Open the Microsoft Authenticator App.

3. Set up different method

Choose “I want to set up a different method” in the left corner of the modal.
Method phone

4. Select method

From the drop-down list “Choose a different method”, select Phone.
Method confirm

5. Confirm method

Once you have chosen phone as a method click confirm.

6. Enter a phone number

A mobile phone is ideal, but a landline will work if there is no prompt menu on this phone. After entering a phone number click “Next”.
Set up the Microsoft Authenticator app.

7. Set up the Microsoft Authenticator app

Click “Next” on the desktop screen. In the app on your phone, click the “+” button on the top right corner to choose a work or school account.
Scan the QR code.

8. Scan the QR code

The Microsoft Authenticator App will then ask if you want to log in or scan a QR code. Choose to scan a QR code and scan the code that is present on your desktop screen. Then, click “Next”.
success

9. Success!

Click “Done” to continue signing in.
You are signed in message.

10. You are signed in!

You have now successfully signed in using multi-factor authentication.

Register a new Thule Account

If you want to register a new account with Thule.net, fill out the form you see at the bottom of the sign-in page. Then, complete the multi-factor authentication steps above.

Fill in the form and set up your account.

1. Fill in the form and set up your account

Fill in the form at the bottom of the home page and wait for a confirmation email from customer service that confirms you have successfully been granted access.
Click sign in.

2. Click “Sign in”

To sign in using multi-factor authentication, click “Sign in”, then complete the multi-factor authentication steps above.